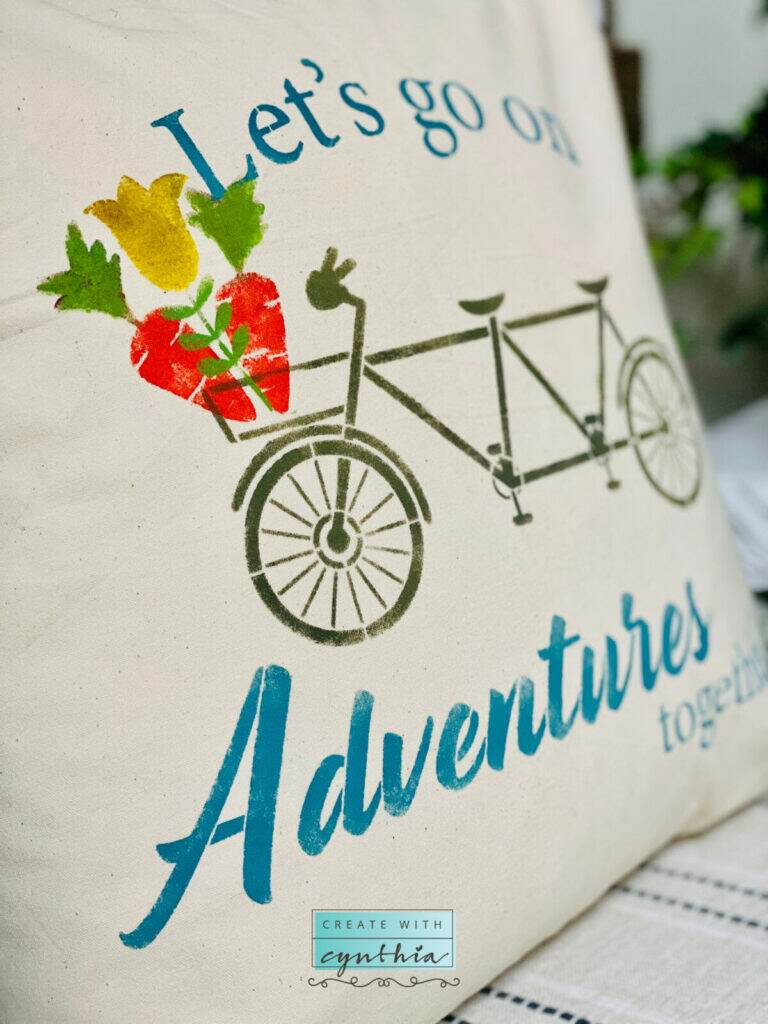
Looking for easy ways to add Spring Decor to your home? Stencil a pillow cover using Gel Art Ink and Essential Stencils. Let’s go on Adventures Together!
I love going on adventures, Sweet Friends, do you? Today on the blog is a video and tutorial on how to create a Stenciled Pillow for Spring. You may have seen my Facebook Live a few weeks back on the project. You can watch my video on You Tube on the project.
Stenciled Pillow for Spring!
Welcome to Create With Cynthia, I hope you will become a regular visitor!
Create With Cynthia is a place where I share ideas and inspiration on DIY Home Decor and Furniture Makeover projects all with a season flair. I love to share about my family of five. I’m grateful for my two teen boys and my two pups. I love to share our adventures in and around our little town in Northern California. You can follow me on my website or You Tube channel to create these projects. You can purchase the products or my completed handmade goods, on my online website CreateWithCynthiaShop.com.

Let’s Go On Adventures Together!
It’s exciting to go on an Adventure. Whether you are riding your bicycle, hiking the mountains, kayaking at the lake, adventures are something to look forward to.
This weekend, my son Troy and I went to our normal spot for a hike with the pups. This hike became an adventure in itself. Normally on our hikes, Troy and I look for birds and lizards and they are not hard to find.

Let’s Go On Adventures Together!
This normal hike was different. What we saw at the Open Space Preserve surprised us. We saw 100’s of goats, fenced into a spot at the beginning of the preserve.

Our normal hike became an adventure that we never expected. On our normal hike we would not see goats eating grass. Normally we are looking for lizards and birds. Sofy loves to chase the lizards and birds.
On this adventure we saw over a hundred goats and they were fenced in with an electrical fence. The goats were happily eating the grass. Some just stared at us as we walked by. We even saw a goat that looked to be pregnant.
This pillow sits on one of my chairs and reminds me of adventures I have taken. One of the adventures it reminds me of is last summer when I kayaked in Northern California. I love being reminded of times I have taken for myself.
Here are some other projects where I’ve used Gel Art Inks and Essential Stencils. I’ve stenciled “Kitchen Towels with Gel Art Inks and Essential Stencils.” I created one of a kind pillows for my home, like I did on this pillow here. Handkerchiefs are fun to customize with Gel Art Inks, like I did here.
Do-It-Yourself Stenciled Pillow!
Now let’s get onto this pillow tutorial.
If you’d like to shop Essential Stencils use the code CWC and receive 10% off your order.
MATERIALS NEEDED TO CREATE A STENCILED PILLOW:
- Stencil by Essential Stencils
- Gel Art Ink products by A Maker’s Studio.
- Stencil Brushes by Essential Stencils
- Pillow Cover
DIRECTIONS FOR CREATING A STENCILED SIGN:
Step one: Gather your materials.
Step two: Prepare your pillow cover by ironing it.
Step three: Insert a piece of parchment paper or cardboard inside the pillow cover. This will ensure that the ink will not leak through the back.
Step four: Use Frog Tape to adhere stencil to surface.
Step five: Use Stencil Brushes with Gel Art Inks.
Step six: Swirl or Pounce paint onto surface. Either stenciling technique; Swirling or Pouncing, works well. I have a video on You Tube for each.
Step seven: Remove frog tape and stencil.
Step eight: Heat set Gel Art Ink into fabric. Place a thin towel over the pillow and iron fabric on 350 degrees for 3-5 minutes.
Tip: If you’d like to wash your pillow cover, turn pillow cover inside out and wash in cold water. Do not place the pillow cover in the iron.
Enjoy your handmade one of a kind creation.
I hope I have inspired you to go out there and Create Something.
Cynthia