• ABOUT
  • Work With Me
  • Blog
    • DIY Home Decor
    • DIY Projects
    • Furniture Makeovers
    • Holiday and Season
    • Travel & Events
    • Life & Updates
    • Weekly Roundups
  • Contact
  • Follow me on social!

Create With Cynthia

DIY Home Decor with a Vintage and Seasonal flair

You are here: Home / DIY Projects / How to Gild Ornaments in 3 Easy Steps!

How to Gild Ornaments in 3 Easy Steps!

November 20, 2018 by Cynthia Nessel

Sharing is caring!

  • Share
  • Tweet
  • Email
cynthia nessel, create with cynthia, how to gild ornaments, diy gild ornaments, a maker's studio, enjoy the bragging rights, craft a beautiful life
Photo from A Maker’s Studio

Hey there, Sweet Friends, today on the blog I will be sharing with you, “How to Gild Ornaments in 3 Easy Steps!”  

Gilding ornaments is super easy and fun!

cynthia nessel, create with cynthia, how to gild ornaments, diy gild ornaments, a maker's studio, enjoy the bragging rights, craft a beautiful life

Gilding can be done on any surface.  You can gild on hardware, glass, metal, plastic and even fabric.  You can read about gilding on a post that I have here.

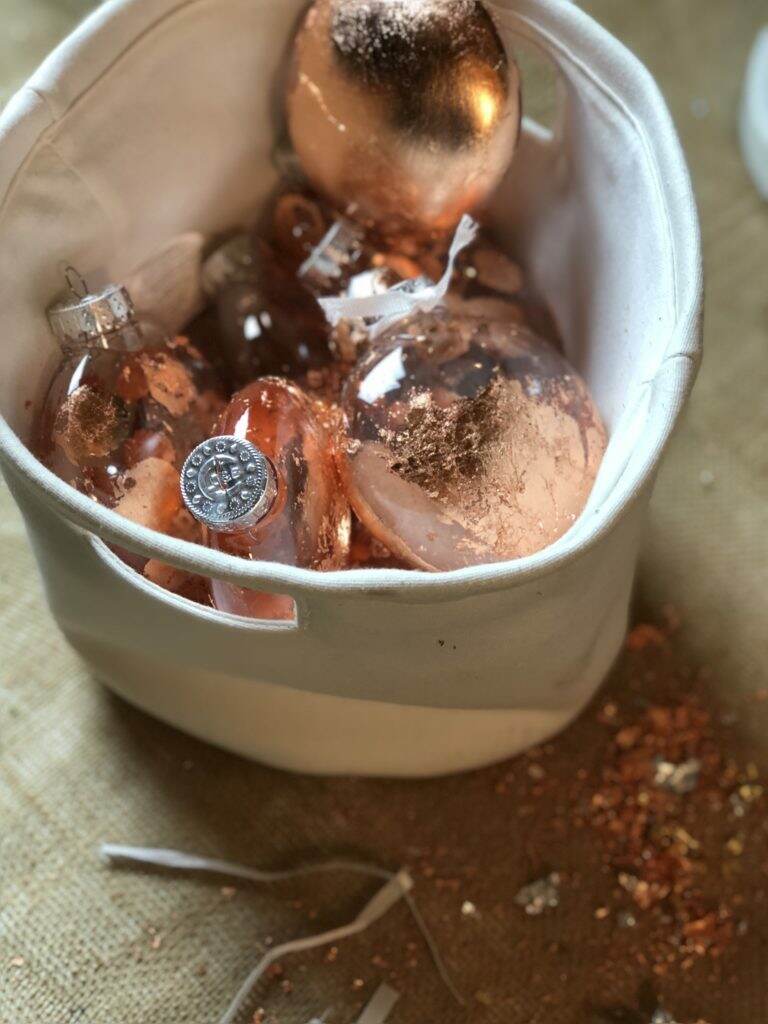
Gilded ornaments add the perfect touch to a Christmas Tree.

This year, I purchased a faux Christmas Tree with lights from Michael’s Arts and Crafts for a great price. It has strands of colored lights and I thought that copper gilded ornaments would complete the tree and my bedroom decor well. I can’t wait to show you how I am “enjoying the bragging rights!”

Today, I will show you “How to Gild Ornaments in 3 easy steps?”

cynthia nessel, create with cynthia, how to gild ornaments, diy gild ornaments, a maker's studio, enjoy the bragging rights, craft a beautiful life

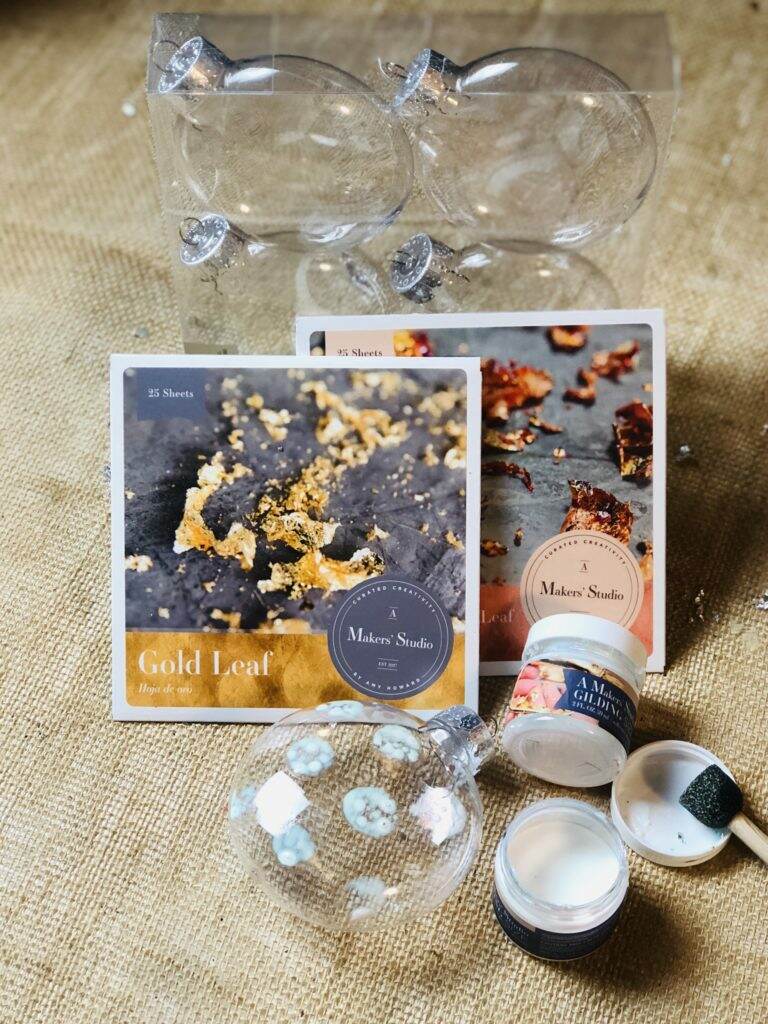
These are the items that you will need in order to Gild Ornaments.

  1. Plastic ornaments (round of sphere) from Michael’s Arts and Crafts.  I purchased mine here.  Don’t forget to use your coupon!
  2. Gilding size from A Maker’s Studio here is the link.
  3. Copper leaf from A Maker’s Studio here is the link.
  4. Foam brush from A Maker’s Studio here is the link.
  5. Chip brush from A Maker’s Studio here is the link.

How to Gild in 3 Easy Steps.

cynthia nessel, create with cynthia, how to gild ornaments, diy gild ornaments, a maker's studio, enjoy the bragging rights, craft a beautiful life
  1. Apply gilding size to ornament and wait for size to come to tack Approximately 10 minutes.
  2. Apply leaf to ornament and then burnish to the ornament.  Burnish means to take the tissue paper in the leaf booklet and rub it so the leaf adhere’s to the ornament.
  3. Use chip brush to wipe away excess leaf.
cynthia nessel, create with cynthia, how to gild ornaments, diy gild ornaments, a maker's studio, enjoy the bragging rights, craft a beautiful life

This year, it will be so nice to wake up to my Gilded Christmas Tree in my bedroom.  It will be a sign of inspiration and hope for my business in the year ahead.

If you are not busy this weekend and live in Northern California, please visit me at my space in Redwood City, 615 Woodside Road, Suite 3.  I will be there on Saturday, November 24th from 10-12noon.  Just look for the black and white balloons on Woodside Road.  

I am still burnishing ornaments and will be revealing my tree soon.

 If you’d like to watch the video on how to Gild ornaments you can go to my You Tube channel and watch it.  Just search on Create With Cynthia or Cynthia Nessel.  You can also watch it here.

cynthia nessel, create with cynthia, how to gild ornaments, diy gild ornaments, a maker's studio, enjoy the bragging rights, craft a beautiful life

Thanks for reading, Sweet Friends, I hope you’ll leave a comment so I know you stopped by.

cynthia nessel, create with cynthia, a maker's studio, gilding leaf, enjoy the bragging rights, craft a beautiful life, holiday decor, diy ornaments

Sharing is caring!

  • Share
  • Tweet
  • Email

Filed Under: DIY Projects Tagged With: A Maker's Studio, Craft a Beautiful Life, Create With Cynthia, Cynthia Nessel, diy gild ornaments, Enjoy the Bragging Rights, how to gild ornaments

the PAST
the FUTURE

FOLLOW ME!

Subscribe Here For:

Hello & Welcome!

Cynthia Nessel, Create with Cynthia

Hi, I’m Cynthia Nessel, the founder and editor of Create with Cynthia, a DIY craft and hobby blog, where I share tips and step-by-step tutorials for vintage enthusiasts. This space is an expression of who I am and what I love to do. ❤ Read More »

Recent Posts

Barstools using Iron Orchid Designs Decor Transfer

Vintage Barstools in a New Space!

My Favorite Dress Up Clothes on Create With Cynthia

My Favorite Dress Up Clothes!

Mother's Day Gift Guide 2021!-8

Mother’s Day Gift Guide 2021 and a Story About My Mom!

Categories

FURNITURE MAKEOVERS

HOME DECOR

DIY PROJECTS

HOLIDAY & SEASON

LIFE & UPDATES

TRAVEL & EVENTS

LINK PARTIES

Follow

Dollar Store Planter Ideas!

Tips on using Iron Orchid Design Transfers on a Furniture Makeover!

Nutcracker Christmas Table Decor!

Selling in an Antique Mall!!!

DIY Monogrammed Handkerchief's!

More Links

  • ABOUT OLD
  • Work With Me
  • Contact me

Create with Cynthia

Vintage Design & Decor

Vintage

Design

FOLLOW ME

Follow @CreateWithCynthia on Instagram

Copyright © 2024 · Create With Cynthia· Website Design by Chantilly Patiño